Integration AWS S3 Bucket Configuration
This guide outlines the steps to set up an AWS S3 bucket, create an SQS queue with the necessary permissions, configure S3 bucket event notifications, and set up the database to connect the bucket with a project.
1. Create an S3 Bucket and Folder
Step 1: Create an S3 Bucket
- Log into your AWS Management Console.
- Navigate to the S3 service.
- Click Create bucket.
- Enter a unique Bucket name (e.g.,
project-files-integration-with-gendox-development). - Select the appropriate AWS Region (e.g.,
eu-central-1). - Configure other settings as needed (versioning, encryption, etc.).
- Click Create bucket to finalize.
Step 2: Create a Folder in the S3 Bucket
- Once the bucket is created, go to the Buckets list and click on your newly created bucket.
- In the Objects tab, click Create folder.
- Enter a Folder name (e.g.,
project-files-integration-with-gendox-development). - Set any necessary permissions and configurations, and click Create folder.
2. Create an SQS Queue with Access Policy
Step 1: Create the SQS Queue
- Go to the SQS service in the AWS Management Console.
- Click Create Queue.
- Choose the Standard type.
- Enter a Queue Name (e.g.,
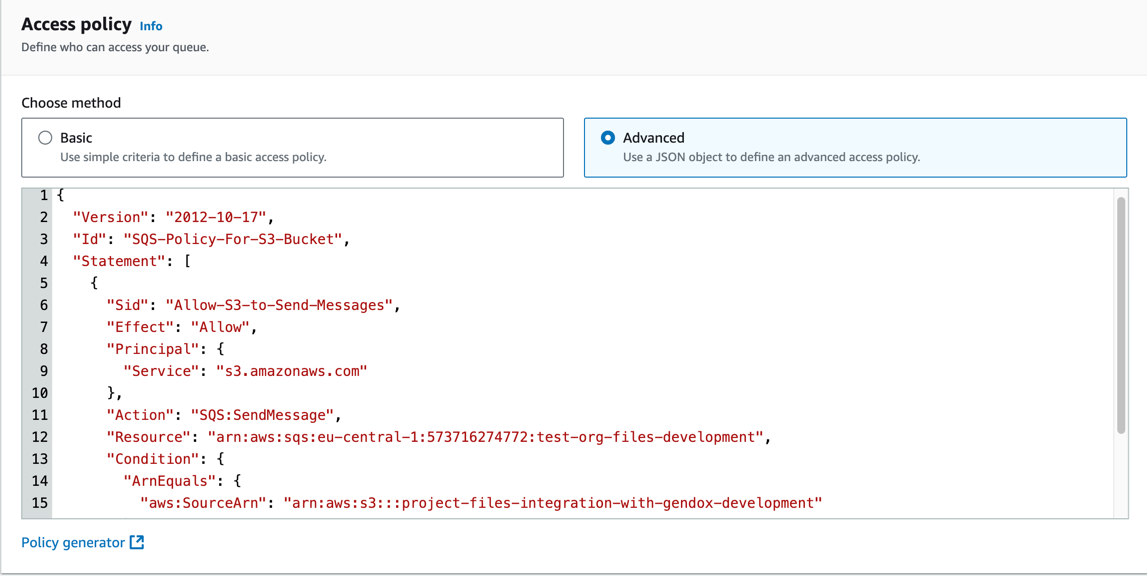
test-org-files-development). - Add Access policy to the queue to allow S3 to send messages to the queue. Here is an example policy:
{
  "Version": "2012-10-17",
  "Id": "SQS-Policy-For-S3-Bucket",
  "Statement": [
    {
      "Sid": "Allow-S3-to-Send-Messages",
      "Effect": "Allow",
      "Principal": {
        "Service": "s3.amazonaws.com"
      },
      "Action": "SQS:SendMessage",
      "Resource": "arn:aws:sqs:eu-central-1:573716274772:test-org-files-development",
      "Condition": {
        "ArnEquals": {
          "aws:SourceArn": "arn:aws:s3:::project-files-integration-with-gendox-development"
        }
      }
    }
  ]
}
 6. Configure other settings if needed, then click Create Queue.
3. Configure S3 Bucket Event Notification
- Go to your S3 bucket (
project-files-integration-with-gendox-development) in the AWS Management Console. - Navigate to the Properties tab.
- Scroll down to Event notifications and click Create event notification.
- Enter a Name for the notification (e.g.,
test-event). - In the Prefix field, enter the folder name (e.g.,
project-files-integration-with-gendox-development/).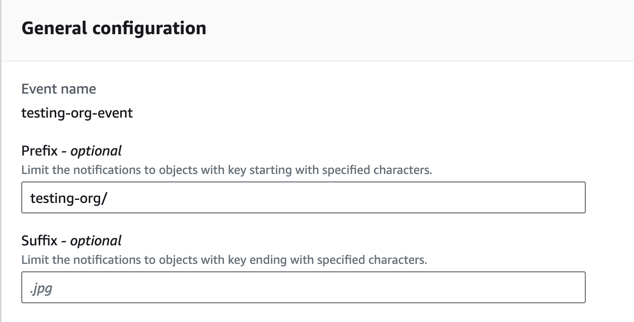
- In Event types, select the events to trigger notifications:
- All object create events
- All object removal events

- Under Destination, choose SQS Queue.
- Put you SQS queue ARN in the SQS queue field.
- Click Save changes to finalize the event notification setup.
4. Database Configuration
To finalize the integration, set up a record in your database to connect the project with the S3 bucket and SQS queue.
Step-by-Step Database Setup
- Insert a new record in the
integrationstable in your database. - Set the following fields:
- project_id: The ID of the project that will use this integration.
- type_id: ID that corresponds to the integration type (e.g., S3).
- is_active: Set to
trueto activate the integration. - queue_name: Name of the SQS queue (
test-event).
Example SQL statement:
INSERT INTO gendox_core.integrations (project_id, type_id, is_active, queue_name)
VALUES ('<your-project-id>', '<s3-type-id>', true, 'test-event');
Replace <your-project-id> and <s3-type-id> with the correct values.