Gendox AI Agent - for WordPress Websites
The Gendox WP AI Agent plugin adds a Gendox chat widget to your WordPress site without writing any code. Train an agent on the posts, pages and WooCommerce products you choose, then the plugin shows the widget automatically on the pages you pick.
Get the plugin from github.com/ctrl-space-labs/gendox-ai-agent.
If you are integrating Gendox into a website that is not WordPress, see
Website Widget Installation instead — that page
covers adding the widget <script> tag yourself.
What the plugin does
- Adds a menu item, Gendox AI Chat, to your WordPress admin sidebar.
- Injects the chat widget on the front end, scoped to whichever post types and taxonomies you assign to a project.
- Exposes your posts, pages and products to Gendox so an agent can be trained on them.
- Embeds the Gendox app directly inside wp-admin so you can manage things without leaving WordPress.
Install
-
In WordPress, go to Plugins → Add New, search for Gendox WP AI Agent, and install and activate it. (Or upload the zip from the plugin's GitHub releases.)
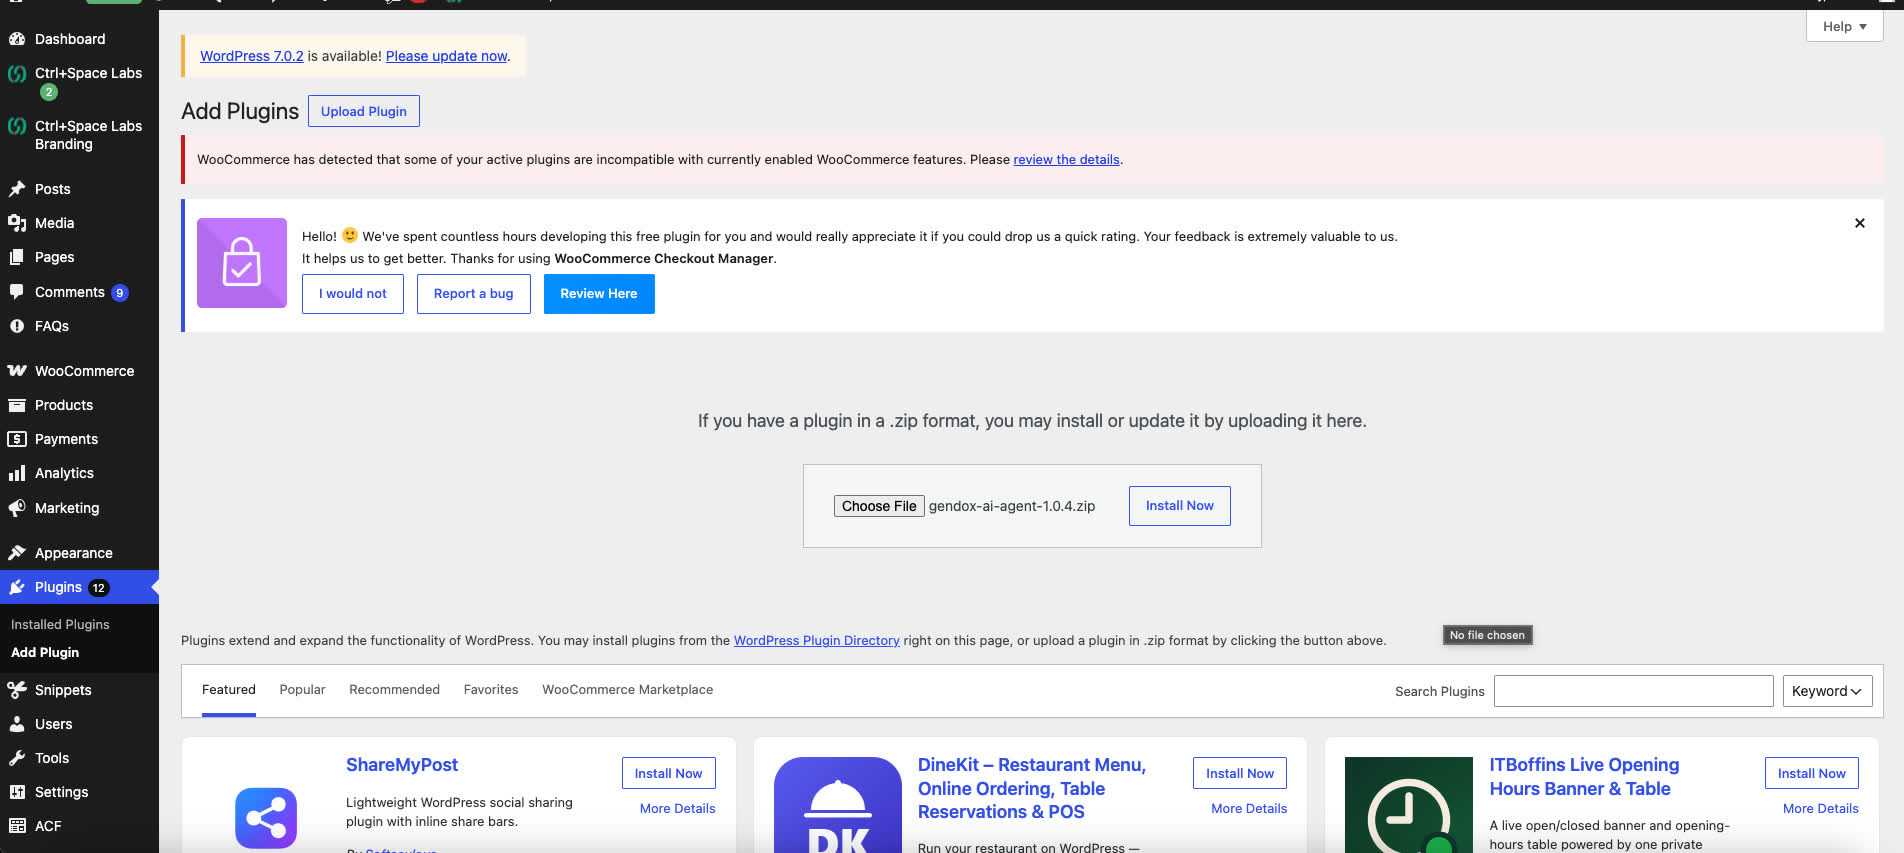
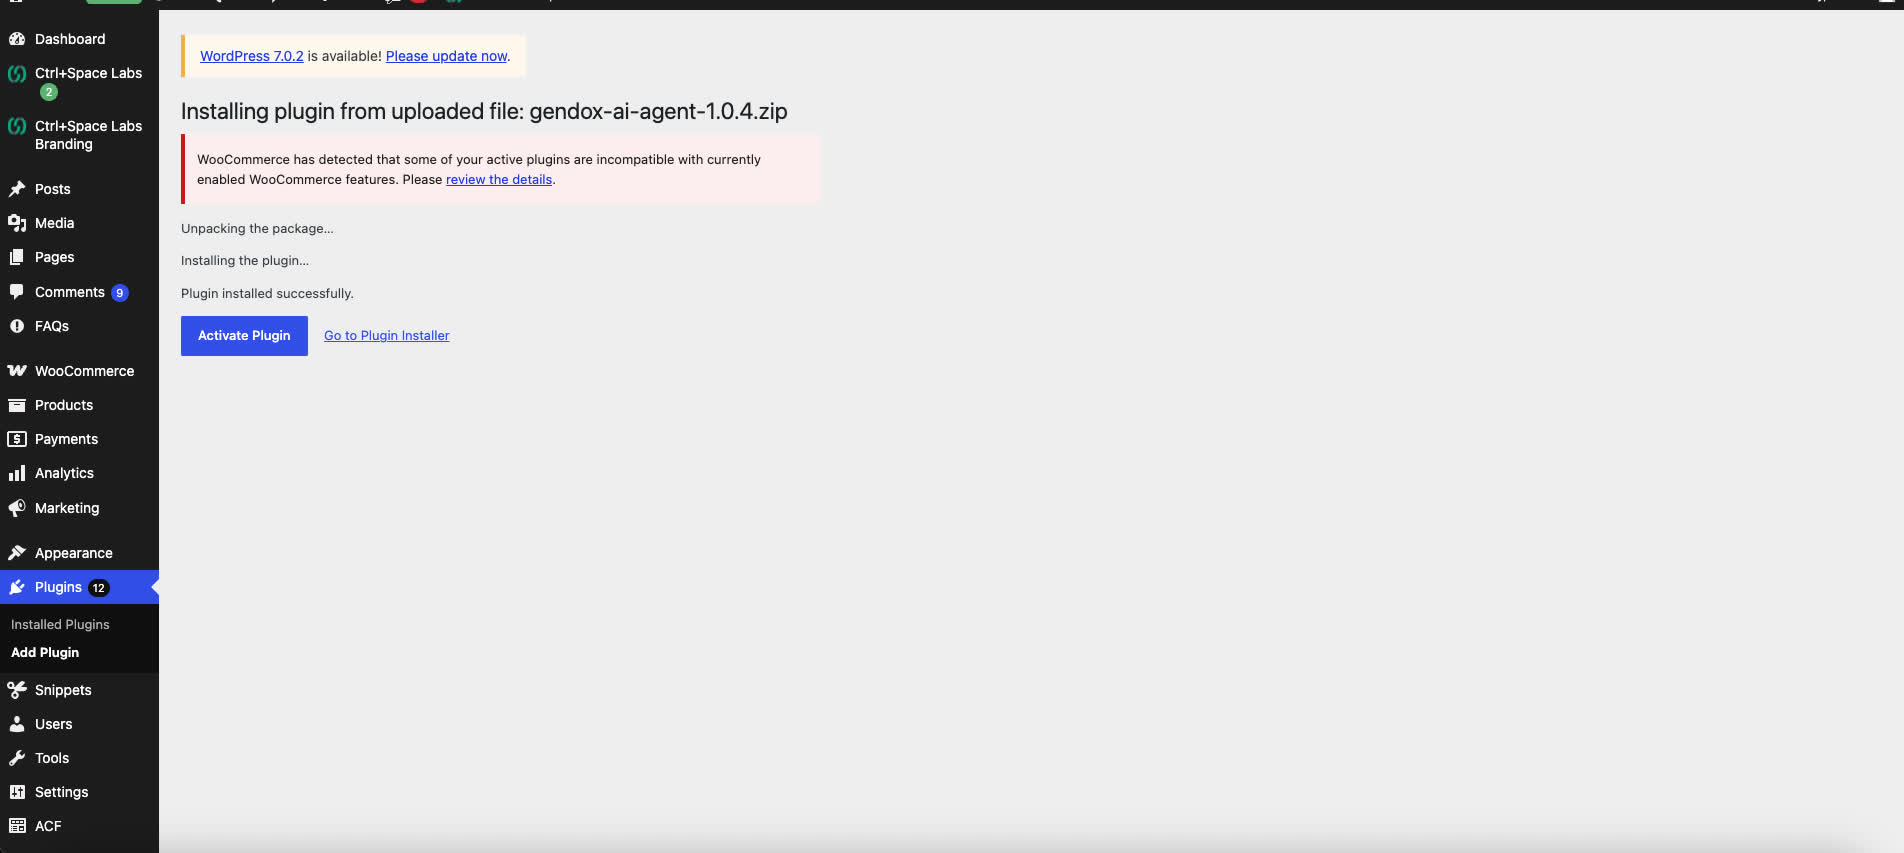
-
Create a Gendox account and project at app.gendox.dev if you don't already have one.
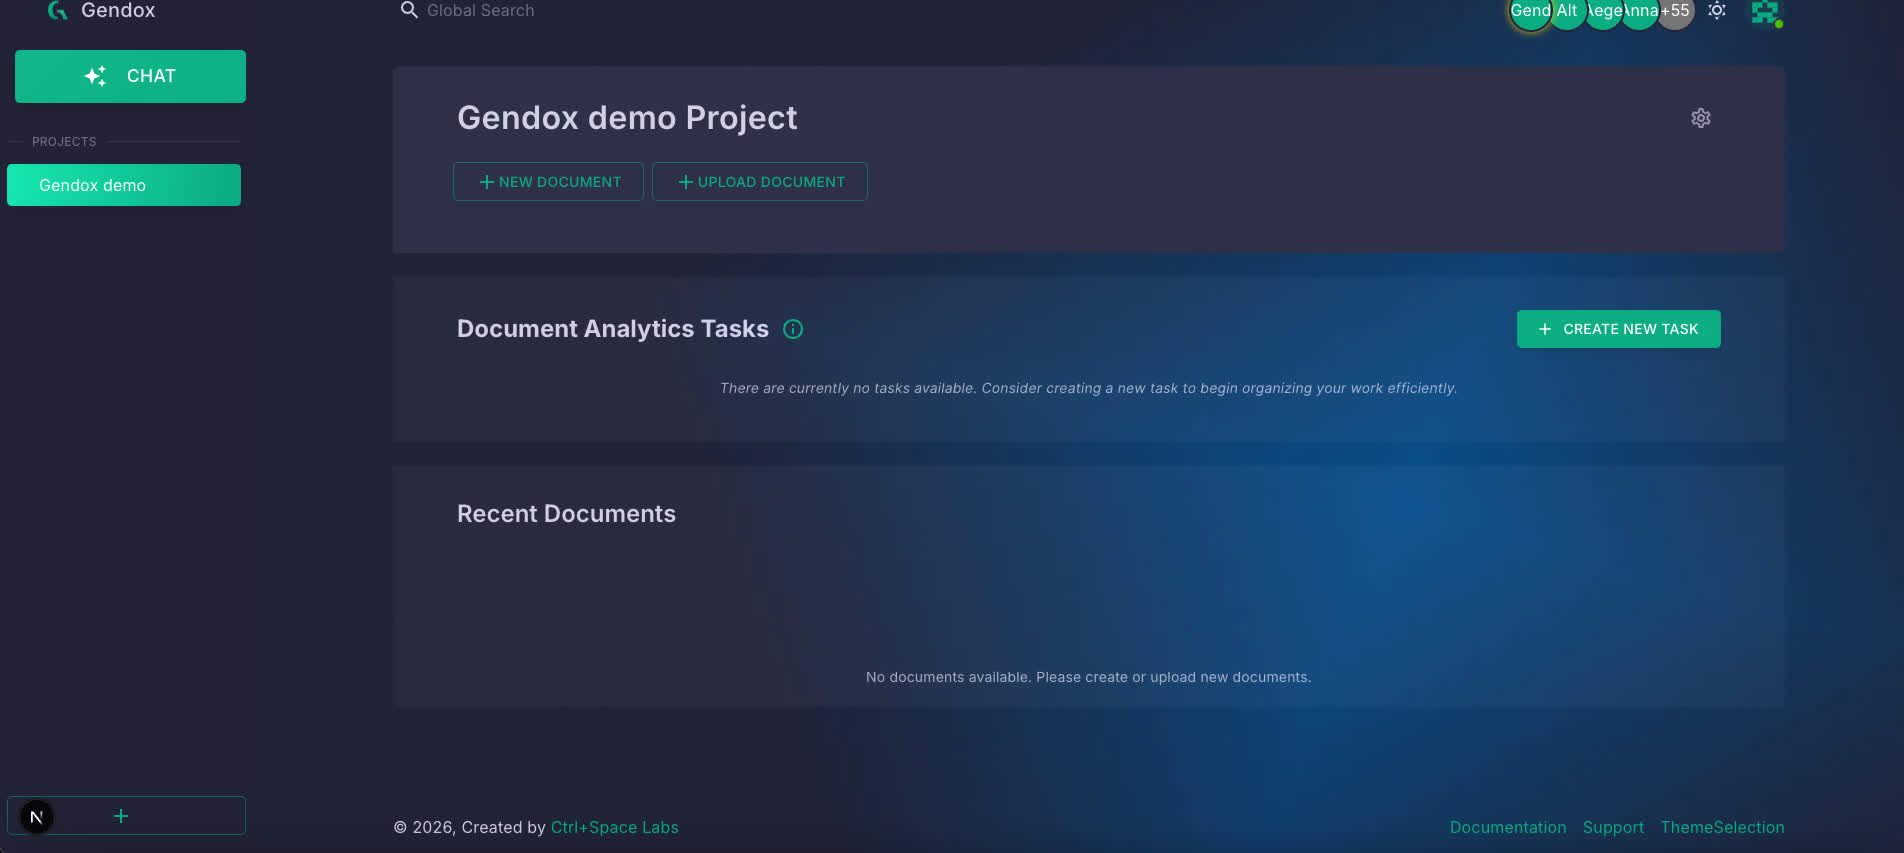
-
Train your agent, then enable it: project → Settings → AI Agent → set Access to Public. (This step is crucial — the widget does not support authenticated end-users yet.)
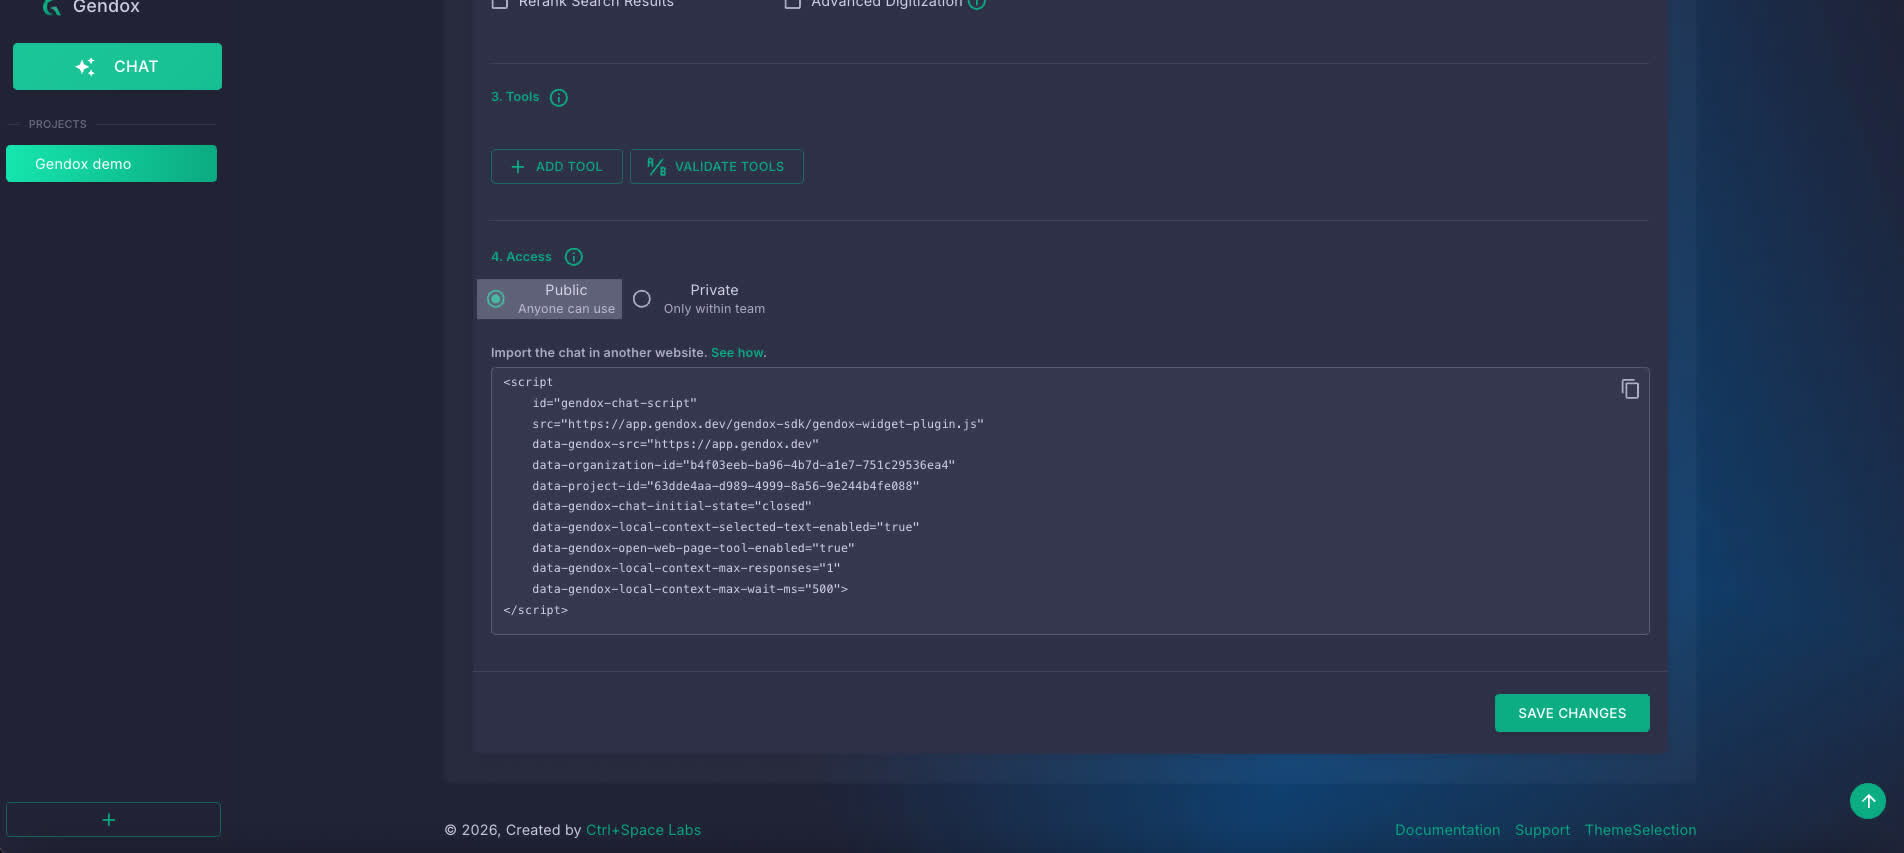
-
Copy your Gendox API key from the Gendox app: Organization Settings → Advanced Settings → API Keys.
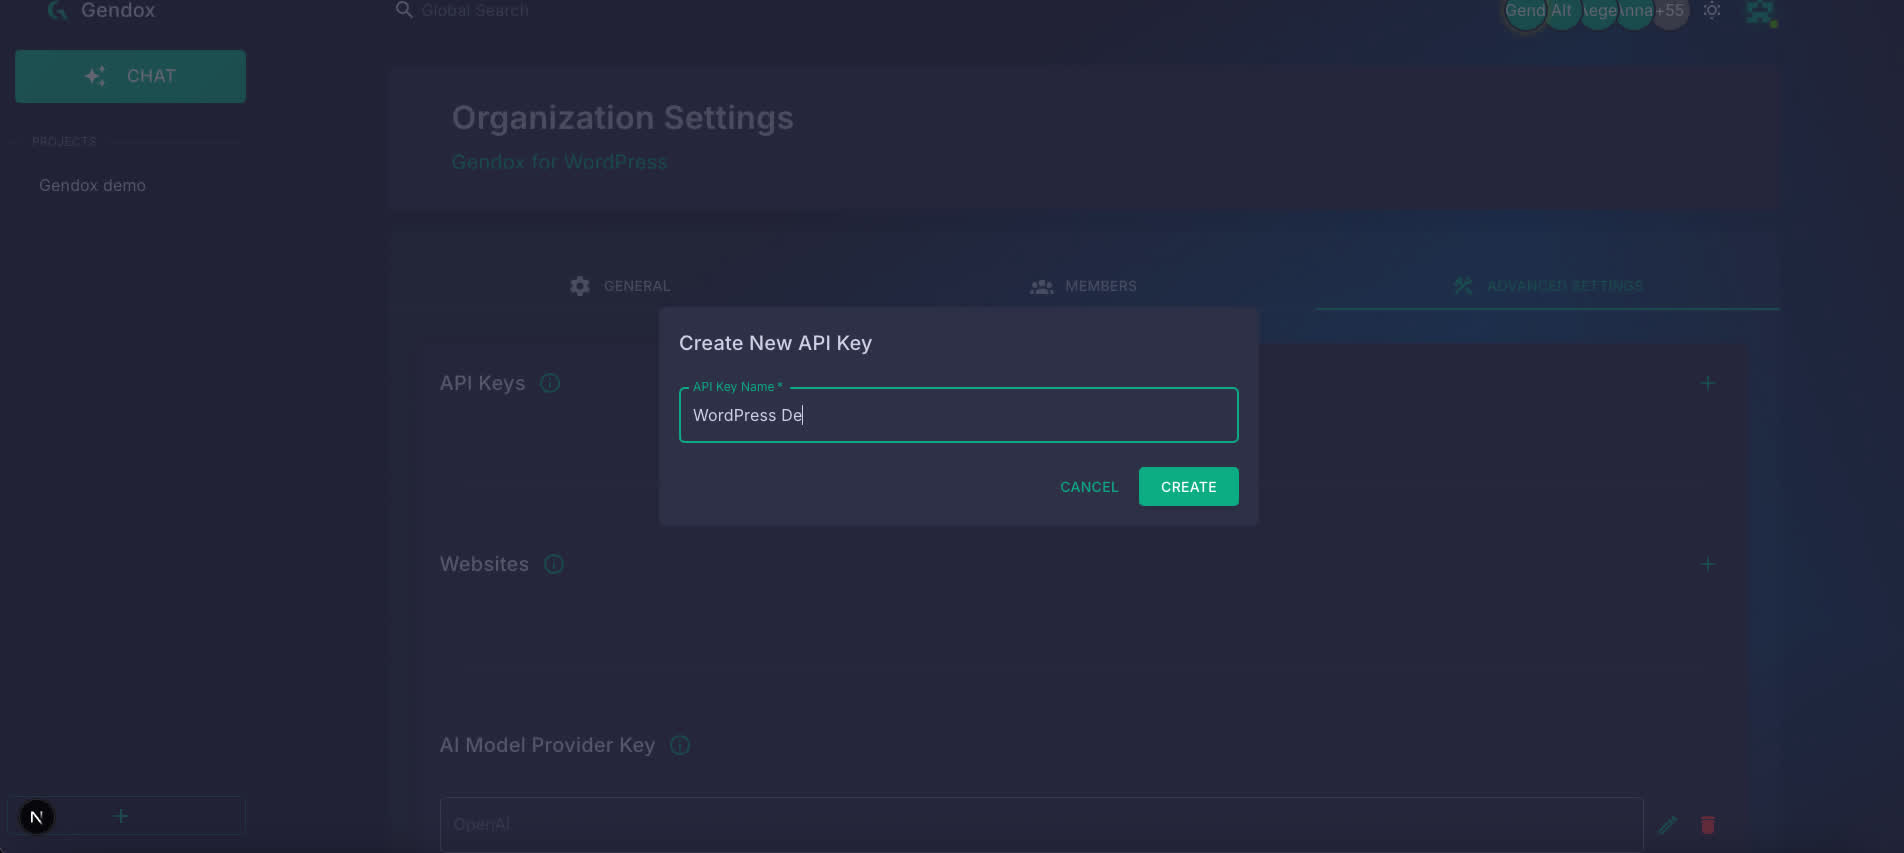
Connect WordPress to Gendox
-
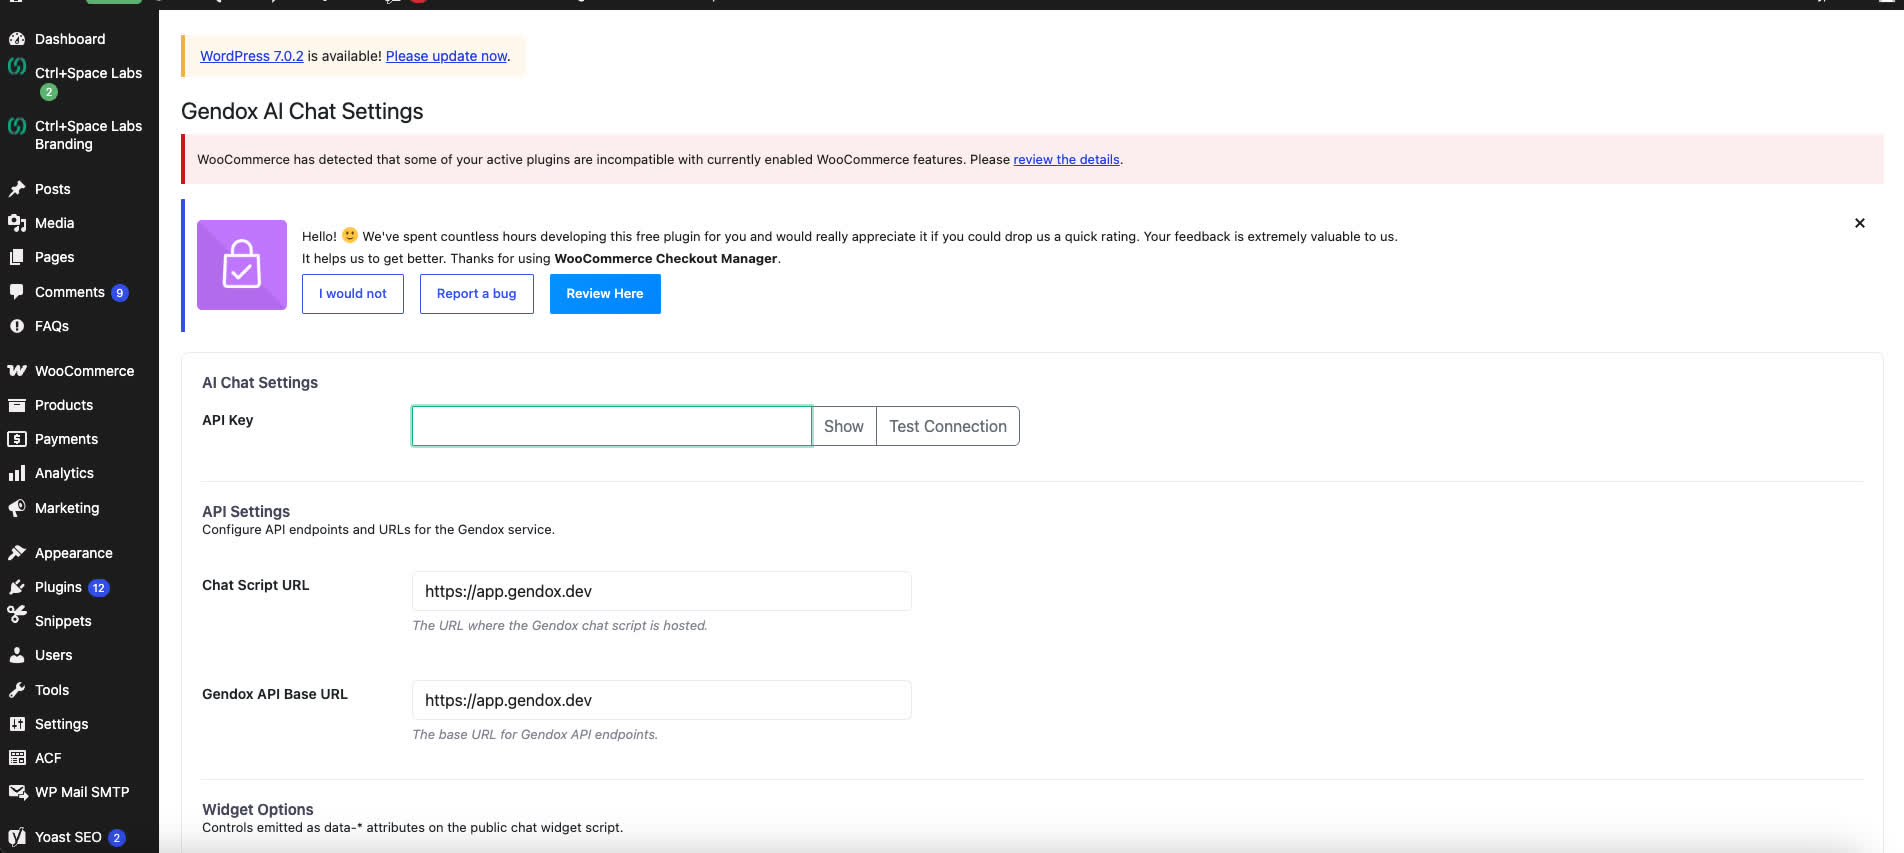
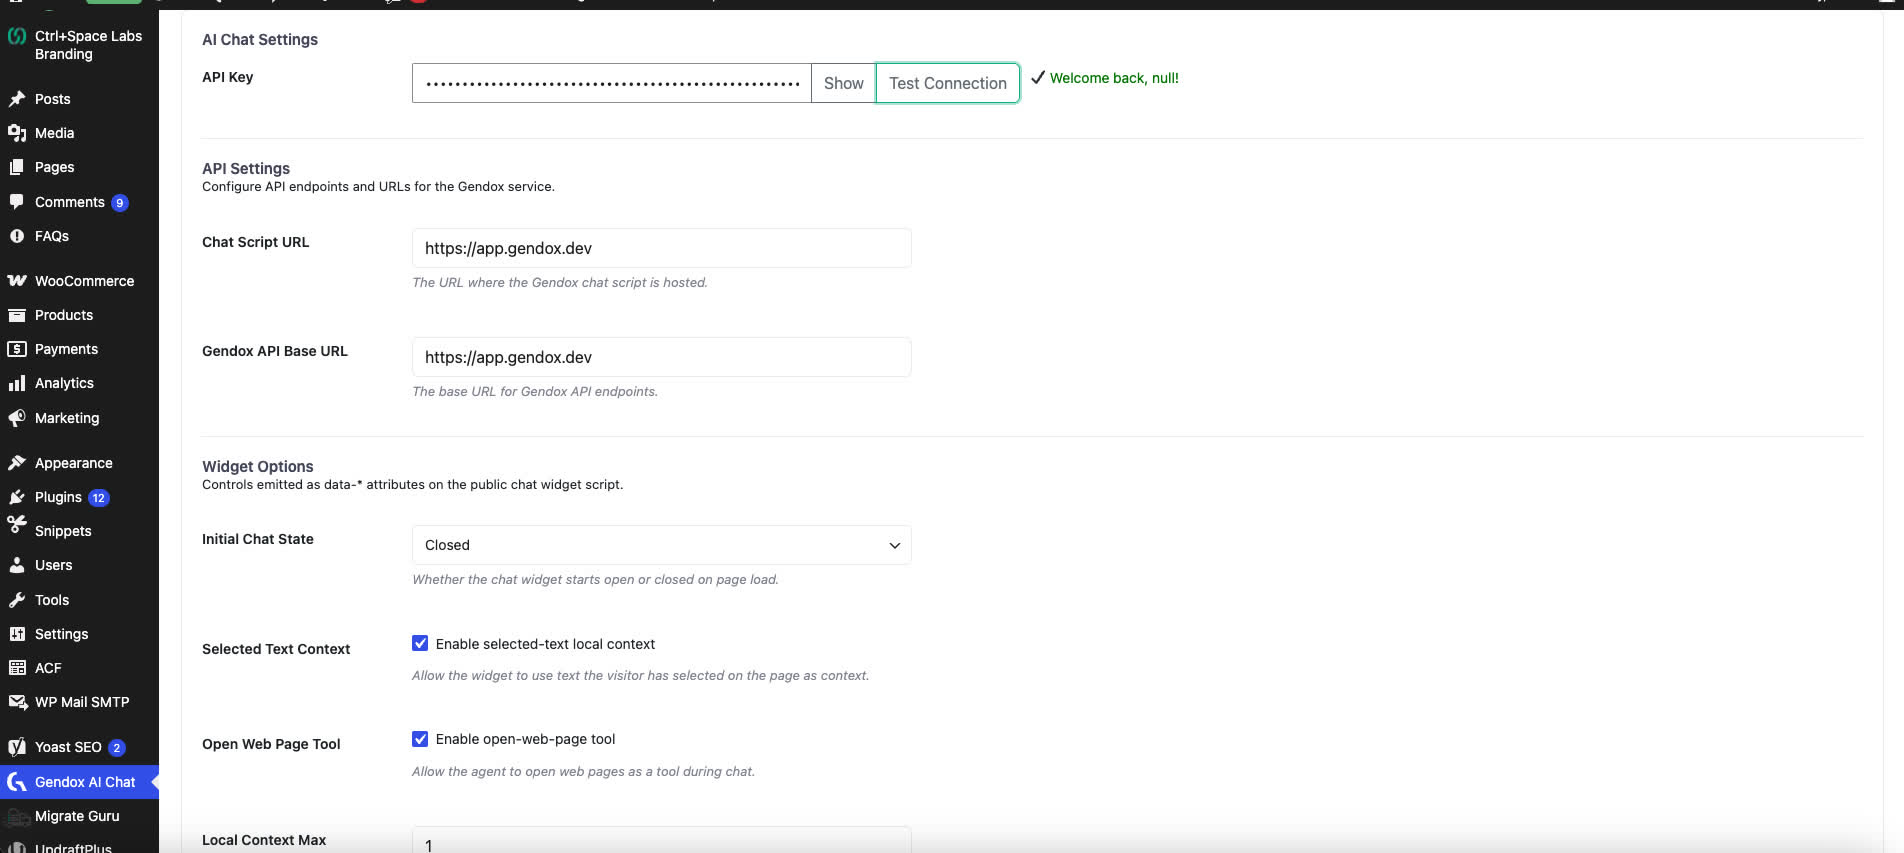
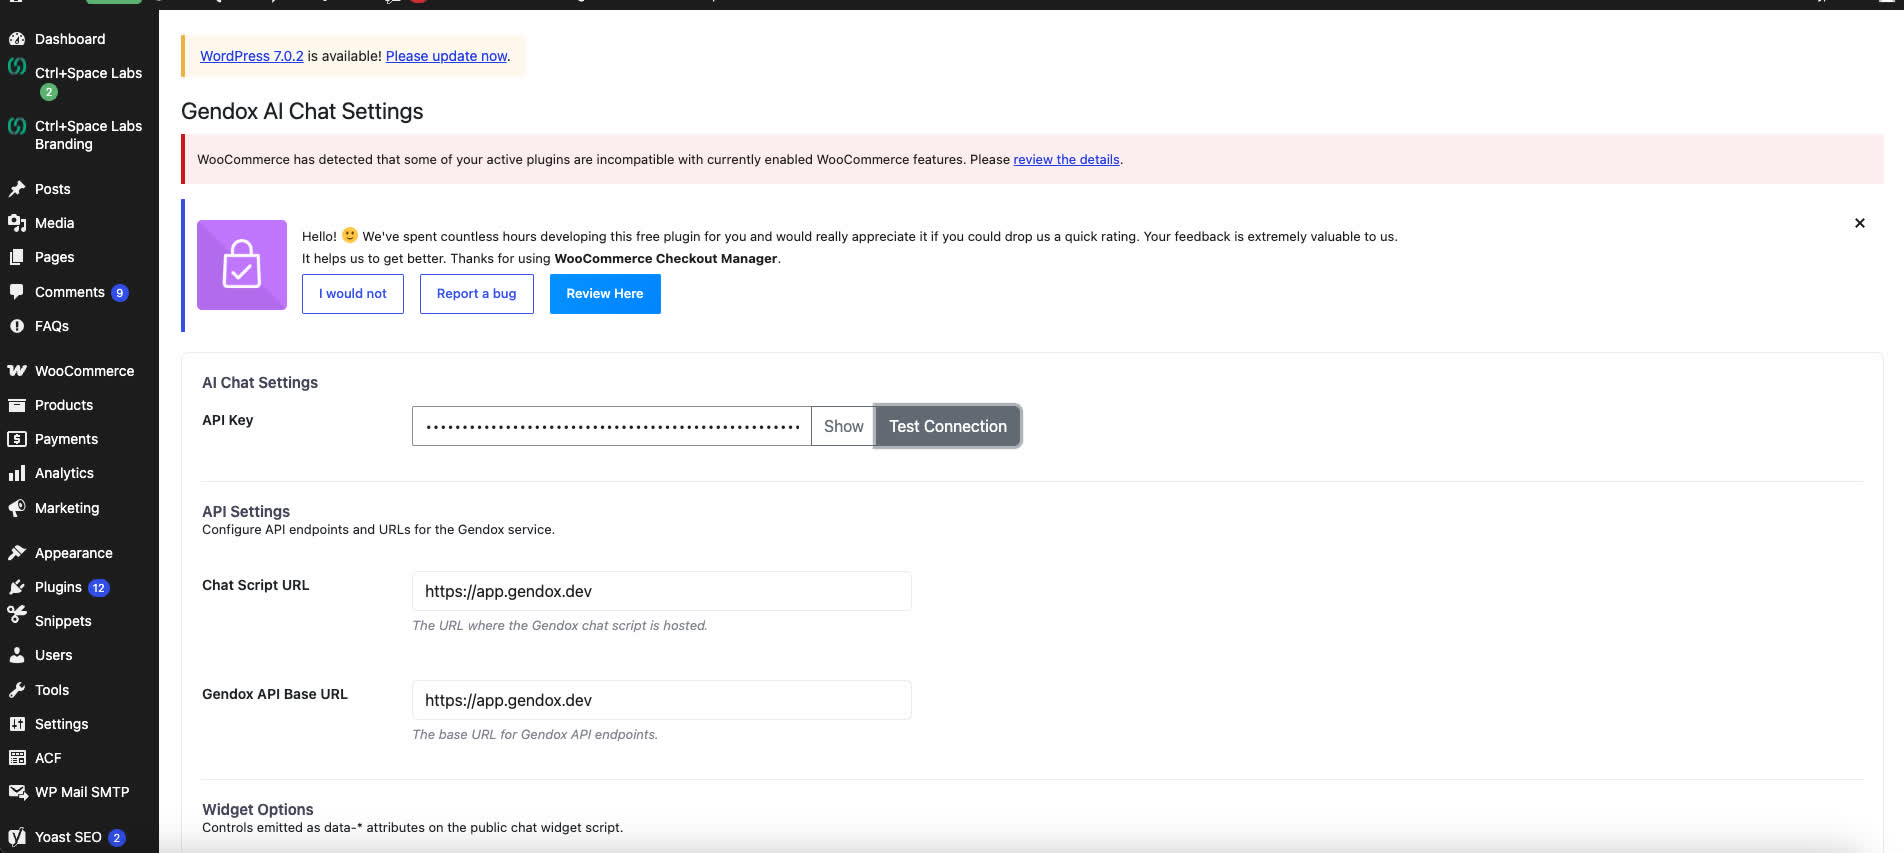
In WordPress, open Gendox AI Chat → AI Chat Settings and paste your API key.
-
Click Test Connection to confirm it works.
-
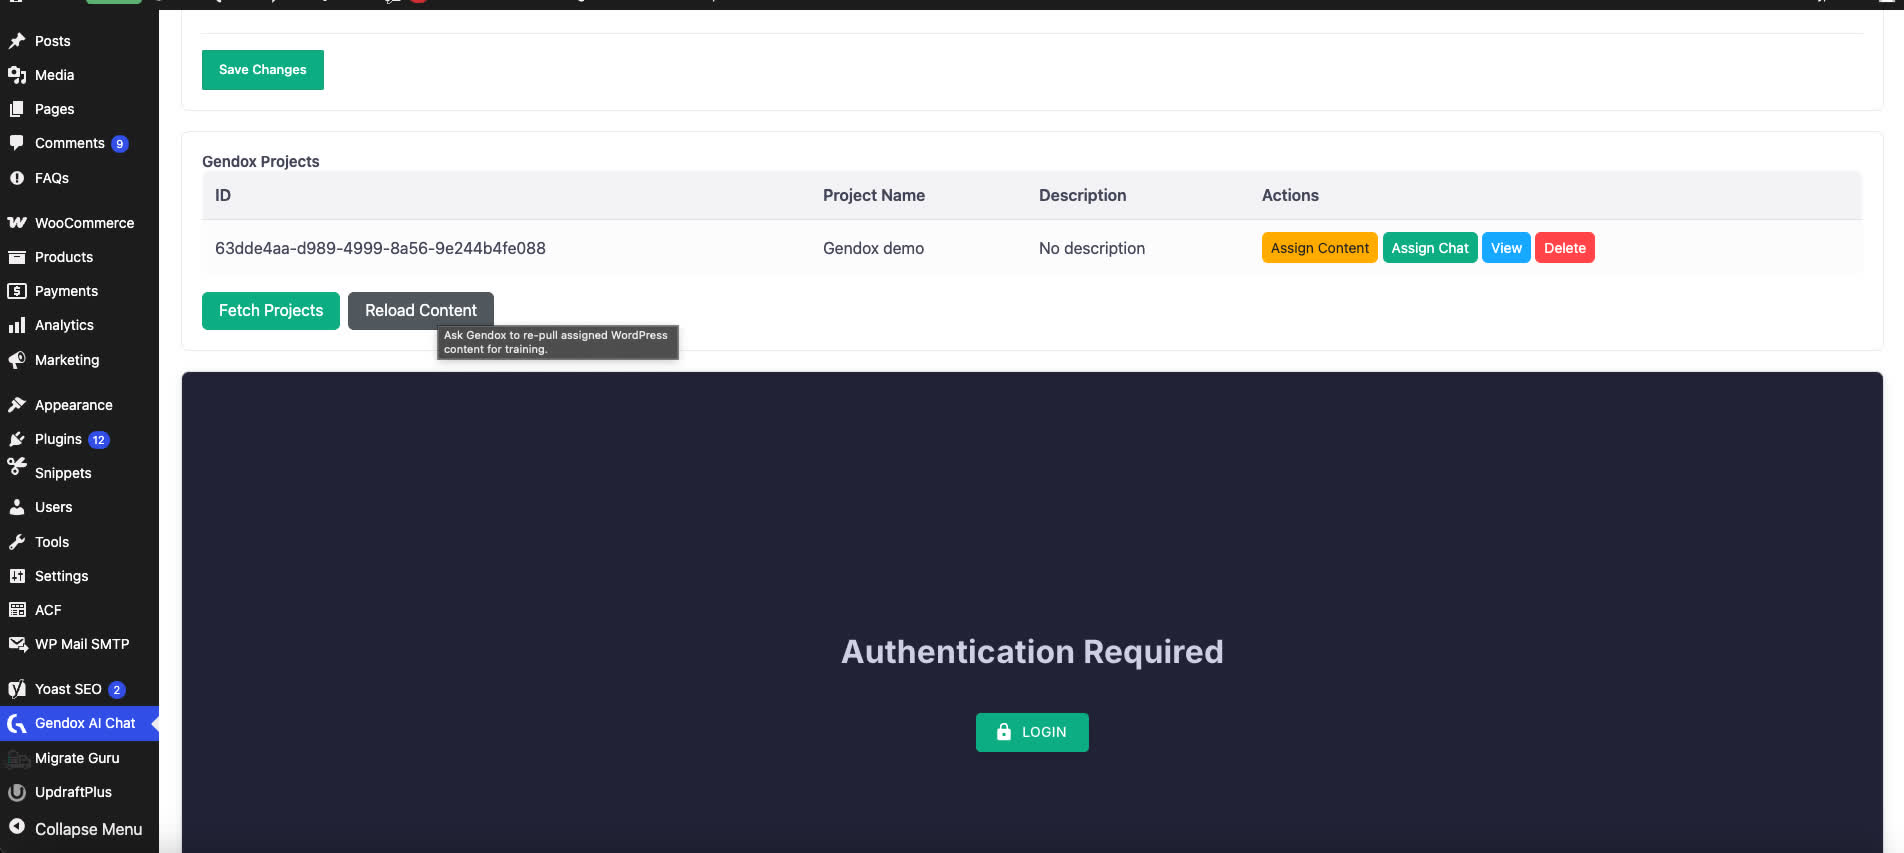
In the Gendox Projects section, click Fetch Projects to pull in your Gendox projects.
-
For each project:
-
Assign Content — choose which posts, pages, or products train that project's agent.
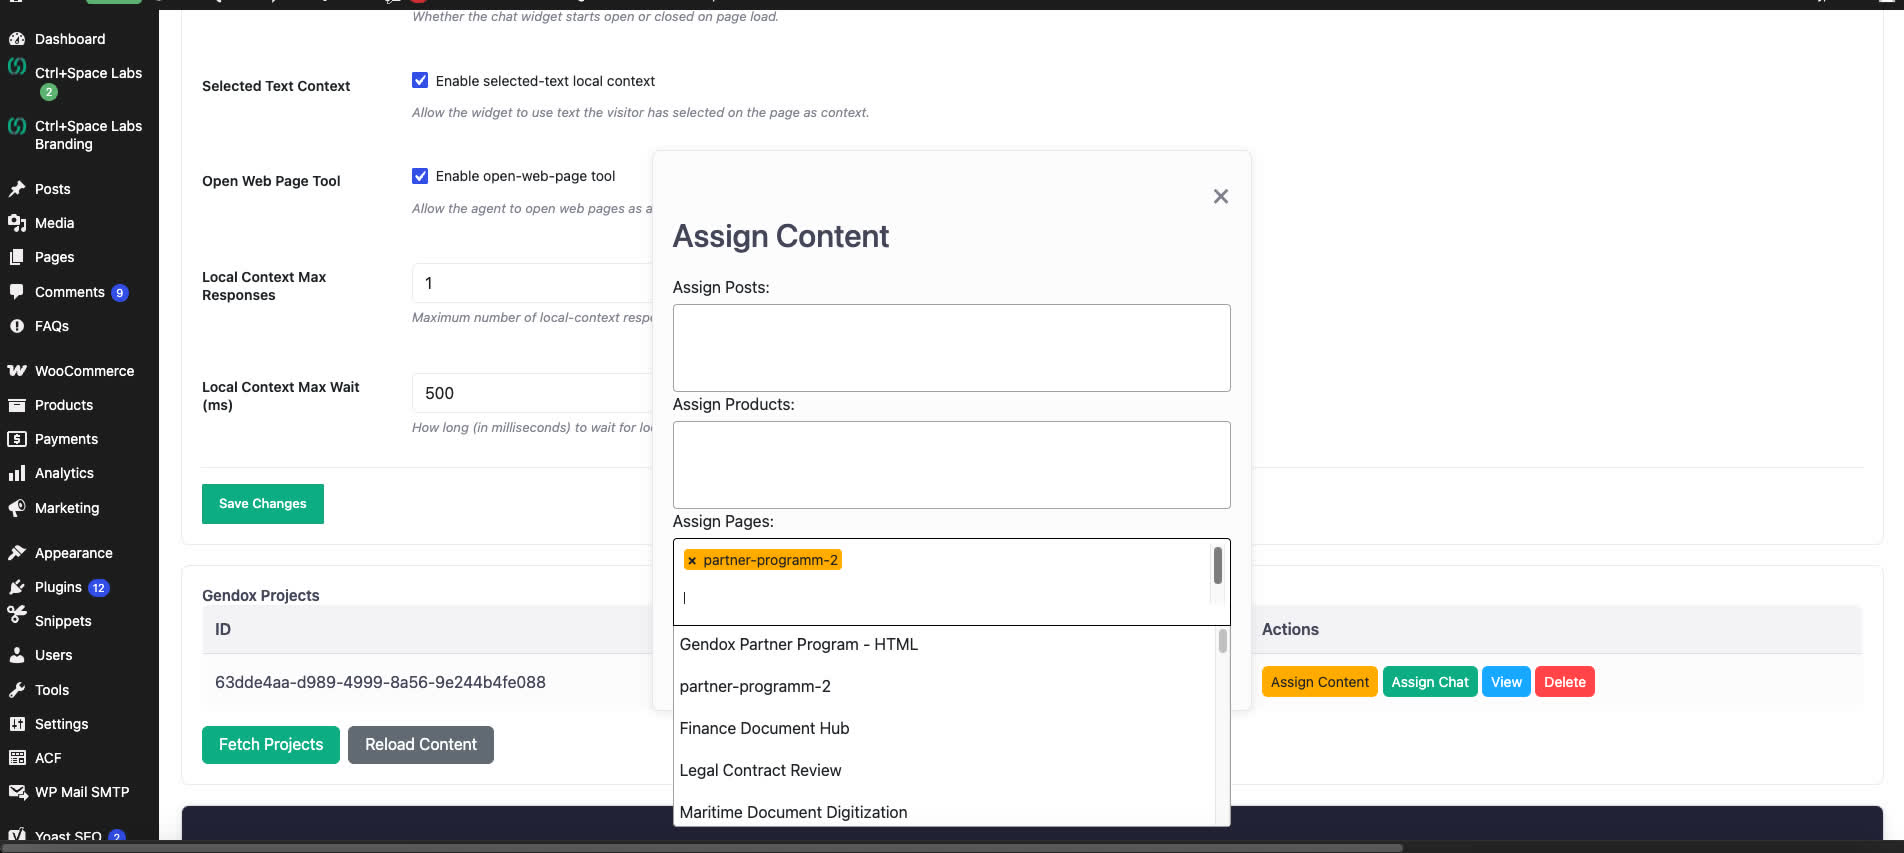
-
Assign Chat — choose which post types and taxonomies should display the widget.
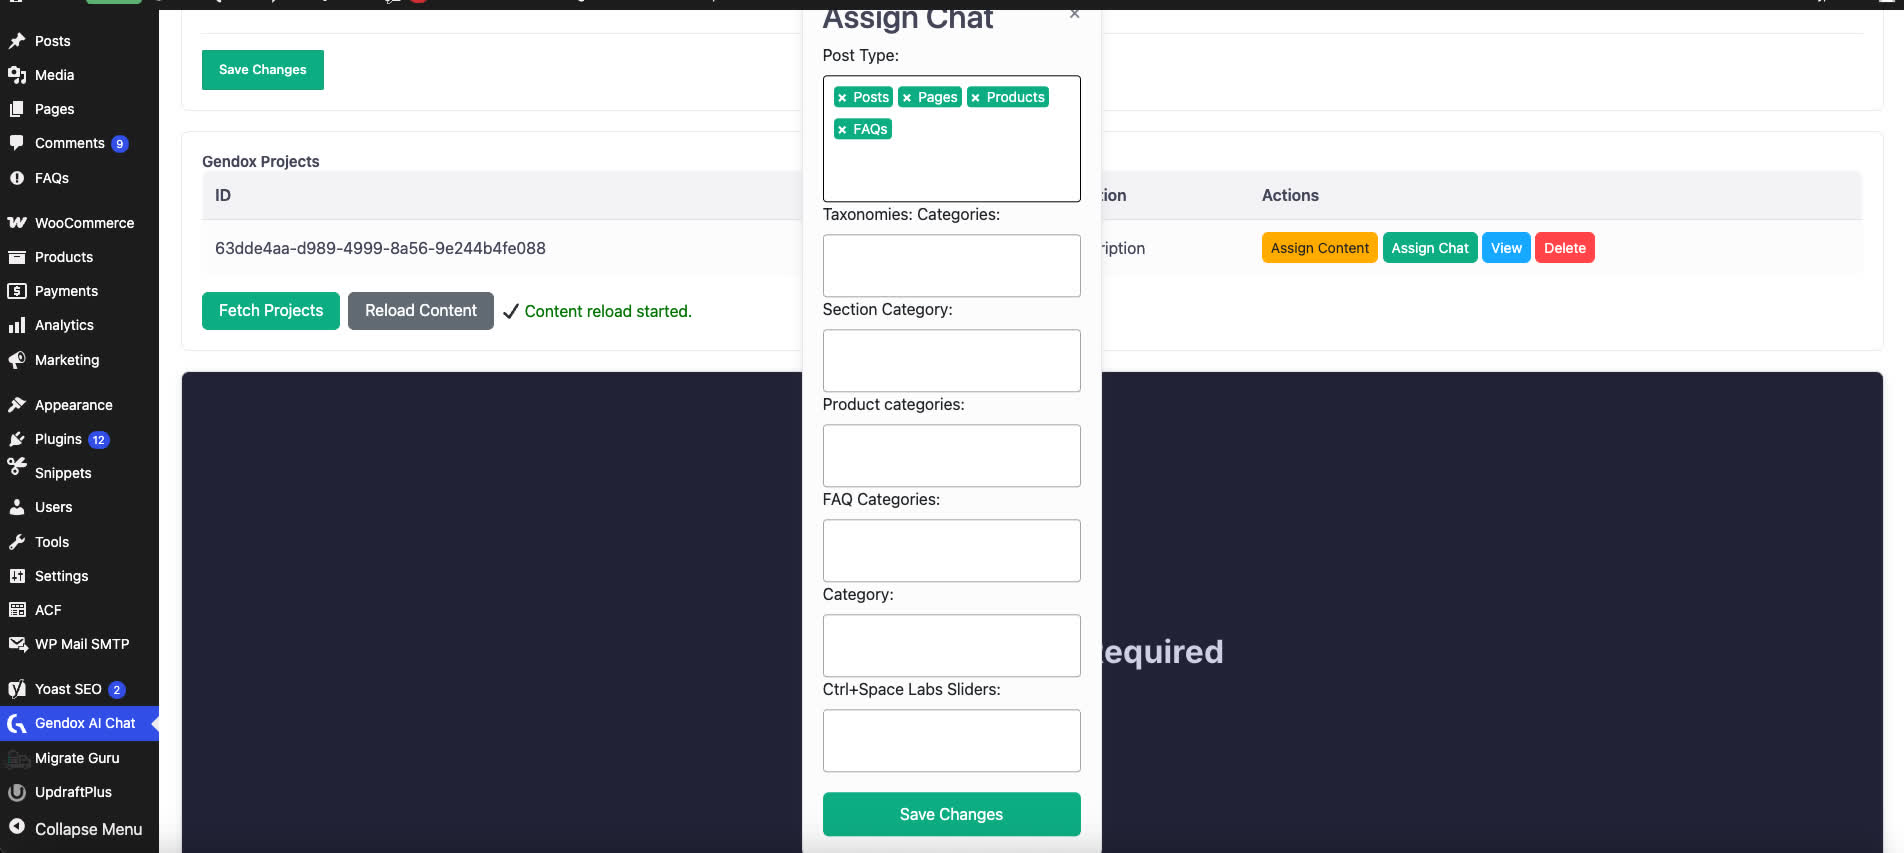
-
The chat widget then appears automatically on matching pages — there's nothing to paste into a theme or page builder.
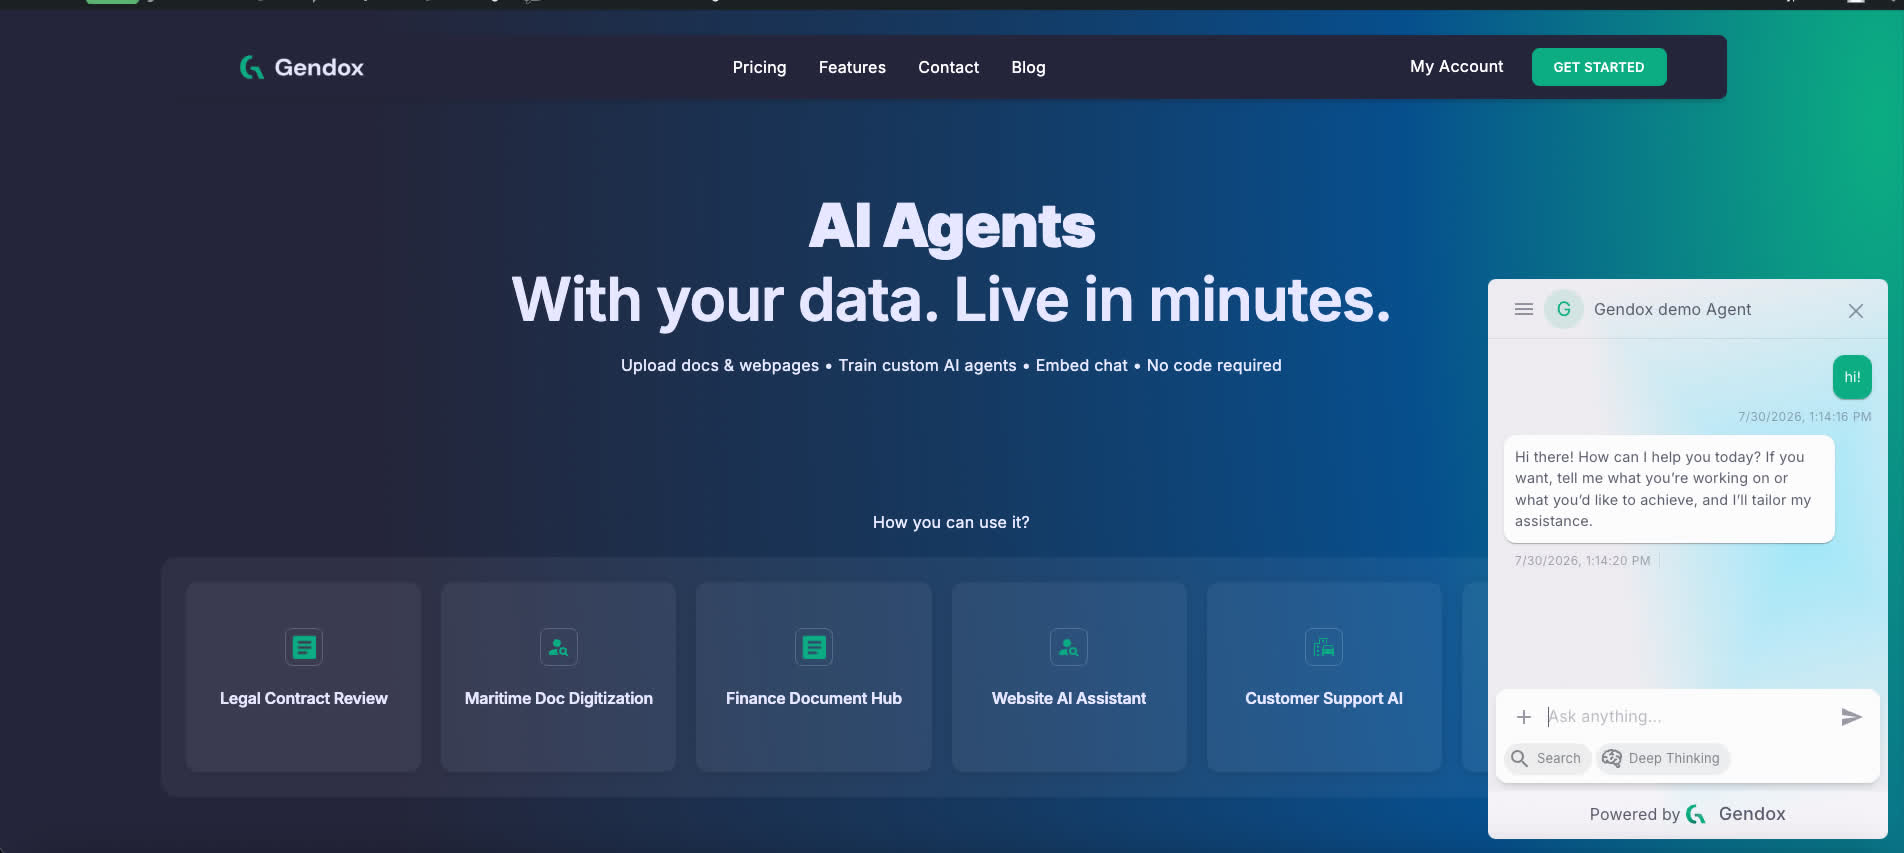
Self-hosted Gendox
If you run your own Gendox instance rather than using app.gendox.dev, set your instance's
URL under API Settings on the same page (Chat Script URL and Gendox API Base
URL).
For developers
Registering custom local context or browser tools works a little differently on WordPress than on a generic site, because the plugin injects the widget script for you rather than you adding it yourself.
Agent skills
If you are using an AI coding assistant (Cursor, Claude Code, OpenAI Codex, etc.), copy the
relevant skill from /skills/ into your project
(.agents/skills/ or .claude/skills/) and invoke it from chat:
| Skill | Use when |
|---|---|
| gendox-wordpress-integration | Setting up the WP plugin, or registering tools / local context on WordPress |
| gendox-widget-integration | Embedding the widget or wiring tools / local context on a non-WordPress site |
Also see the plugin's own README.
Related
- Website Widget Installation — for non-WordPress sites
- Agent Tool Use and Website Tool Support
- Widget Programmer Guide
- Agent Skills catalog — portable skills for AI coding assistants